
Getting started
Your fleet on the map in 15 minutes
Eight short steps, each with a screenshot of the real product. You need a computer for the dashboard and each driver needs the NaviTruck app on their phone.
- 1Create your fleet account
- 2Activate your access code
- 3Add your first truck
- 4Add a driver and connect the app
- 5Watch your trucks live
- 6Draw a place (geofence)
- 7Set up alert rules
- 8Invite your team and check your plan
Create your fleet account
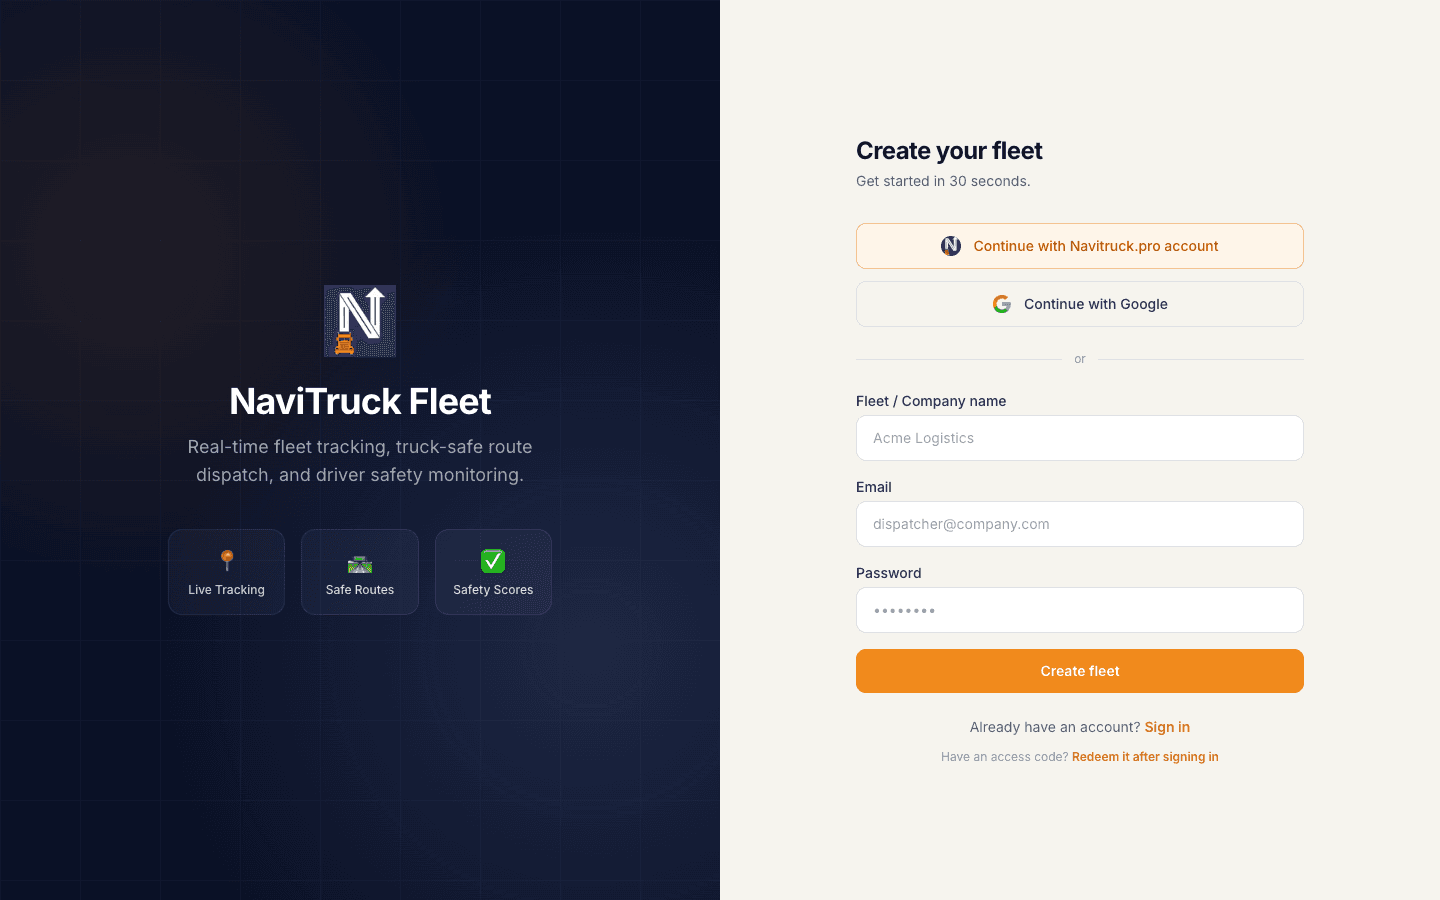
- Go to fleet.navitruck.pro/login and click Create fleet.
- Enter your company name, your email and a password, then click Create fleet. You can also continue with Google or with an existing navitruck.pro account.
- Confirm your email, then you land on your dashboard. Planning routes is free; live tracking starts with a 3-day free trial.
The person who creates the account is the owner. Only the owner can redeem access codes, invite managers and manage billing.
Activate your access code
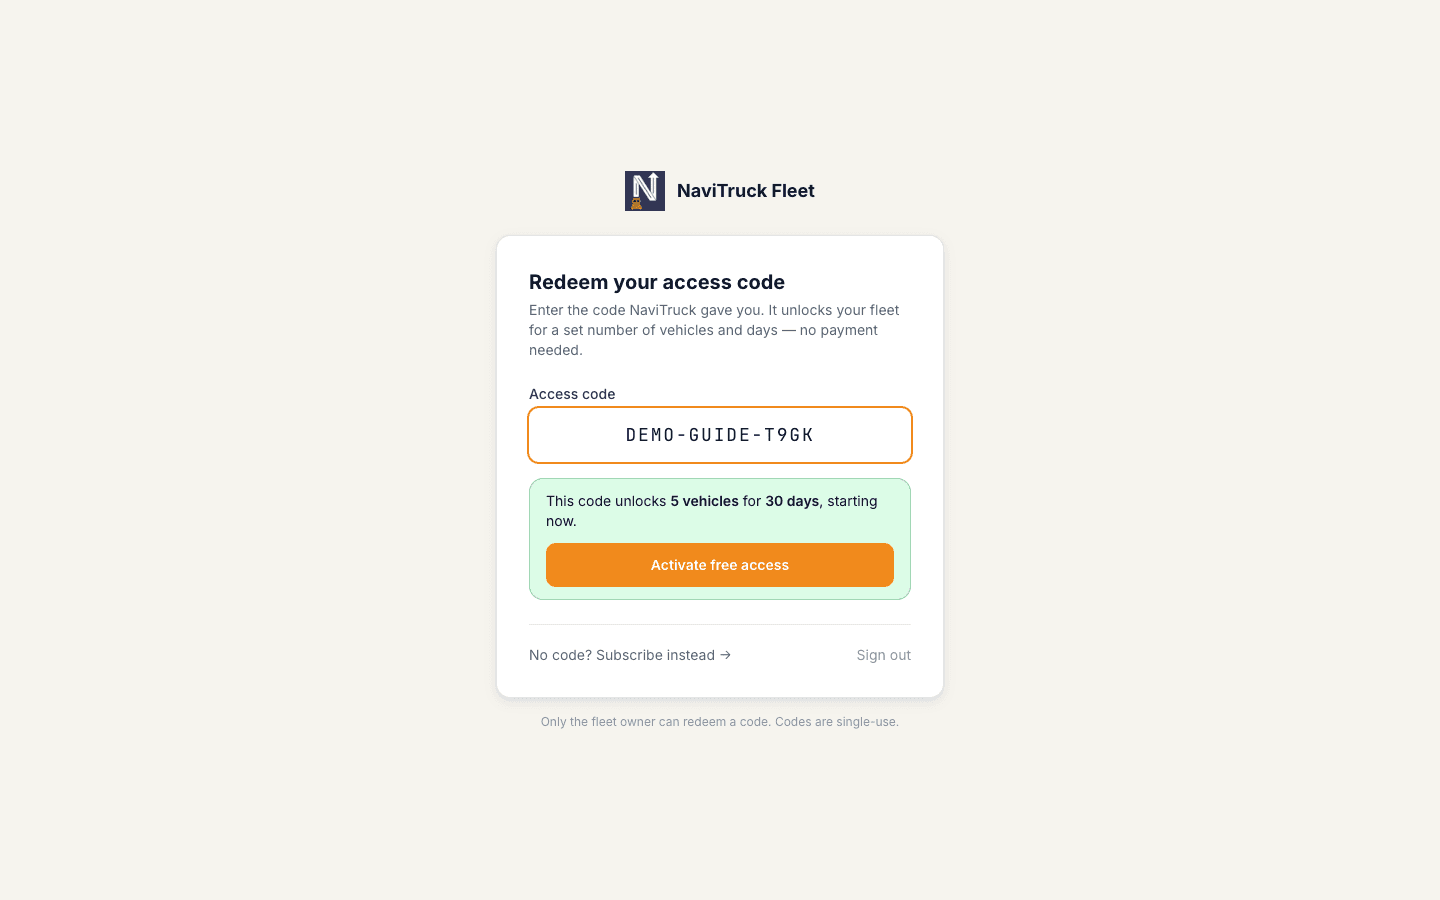
If NaviTruck sent you an access code, it unlocks your fleet for a set number of vehicles and days without payment.
- Click the link in your email. It opens fleet.navitruck.pro/redeem with your code already filled in. Signed out? Sign in or create your fleet first — you are brought straight back.
- No link? Open fleet.navitruck.pro/redeem, type the code and click Check code.
- Read what the code unlocks, then click Activate free access. Your dashboard opens immediately.
Codes are single-use and must be activated before their expiry date. Your end date and seat count are always visible under Settings → Billing.
Add your first truck
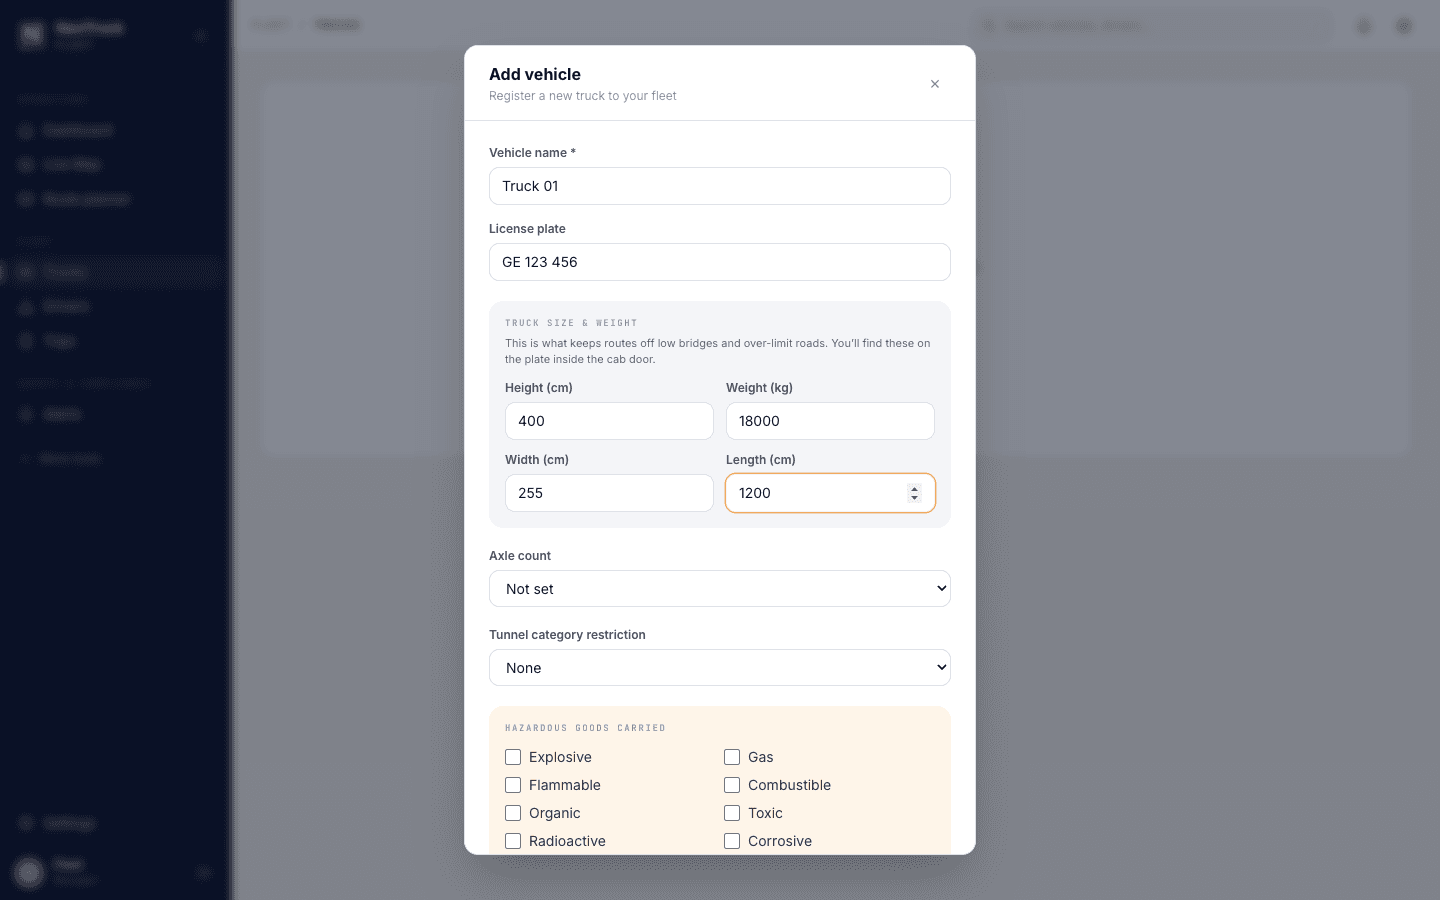
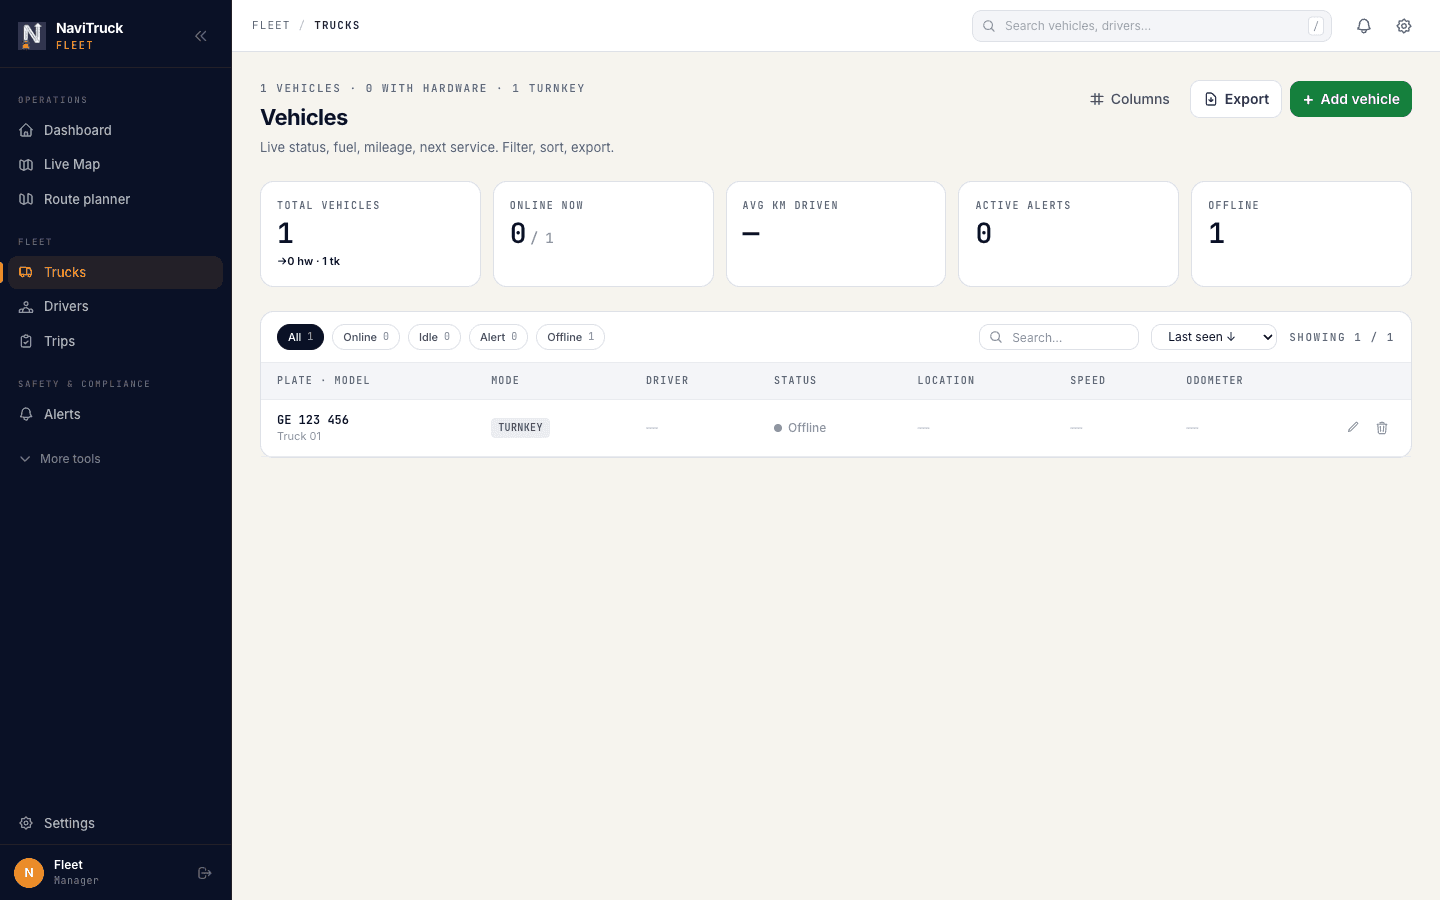
- Open Trucks in the sidebar and click Add vehicle.
- Give it a name and licence plate.
- Fill in height, weight, width and length. NaviTruck uses these to keep routes away from low bridges, weight limits and narrow roads, so real numbers matter.
- Click Add vehicle. Repeat for each truck; one seat covers one truck and its driver.
Add a driver and connect the NaviTruck app
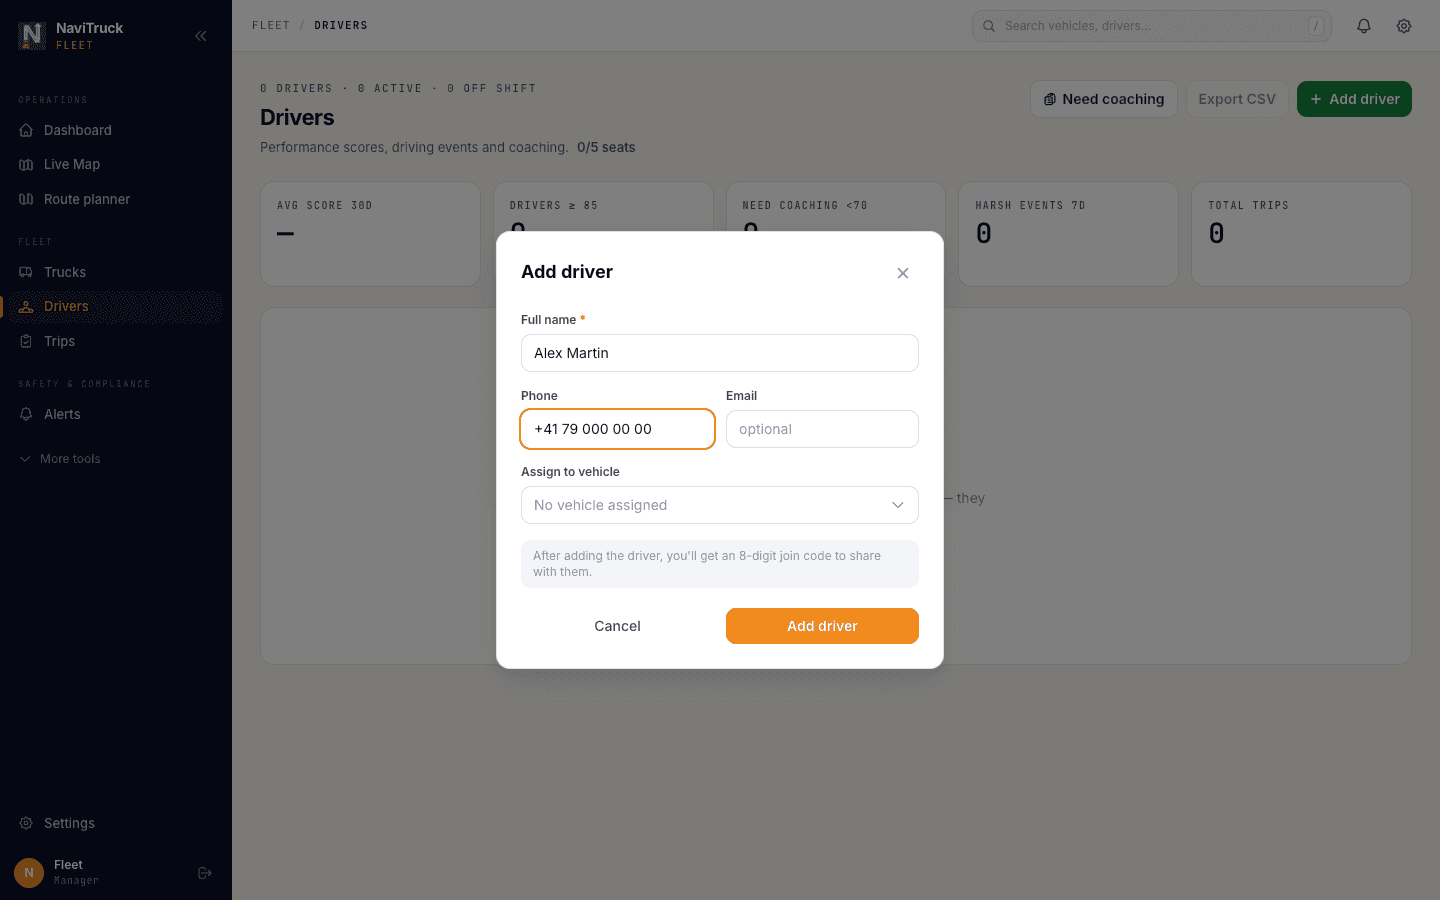
- Open Drivers and click Add driver. Enter the name, phone and, if you like, assign a truck.
- Click Add driver. An 8-digit join code appears — copy it or share it with the driver.
- The driver installs the NaviTruck app on their phone, opens menu → Fleet Program → Join with code and enters the code.
- From now on, whenever the driver navigates with NaviTruck, their truck shows on your live map and their trips, scores and events flow into the dashboard.
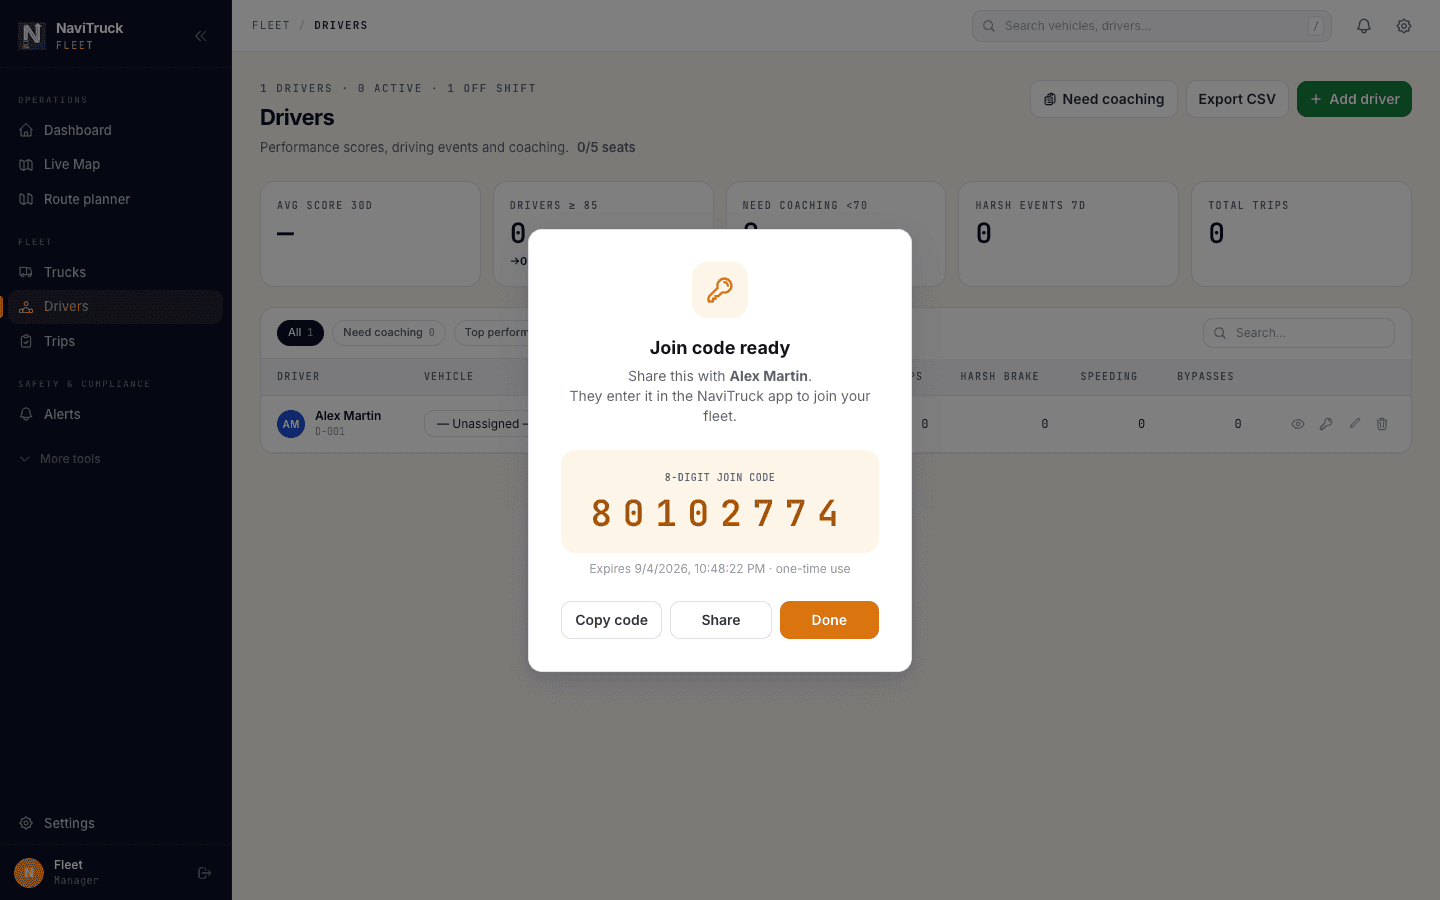
A join code works once and expires after seven days. Need a new one? Click the key icon next to the driver to send another.
Watch your trucks live
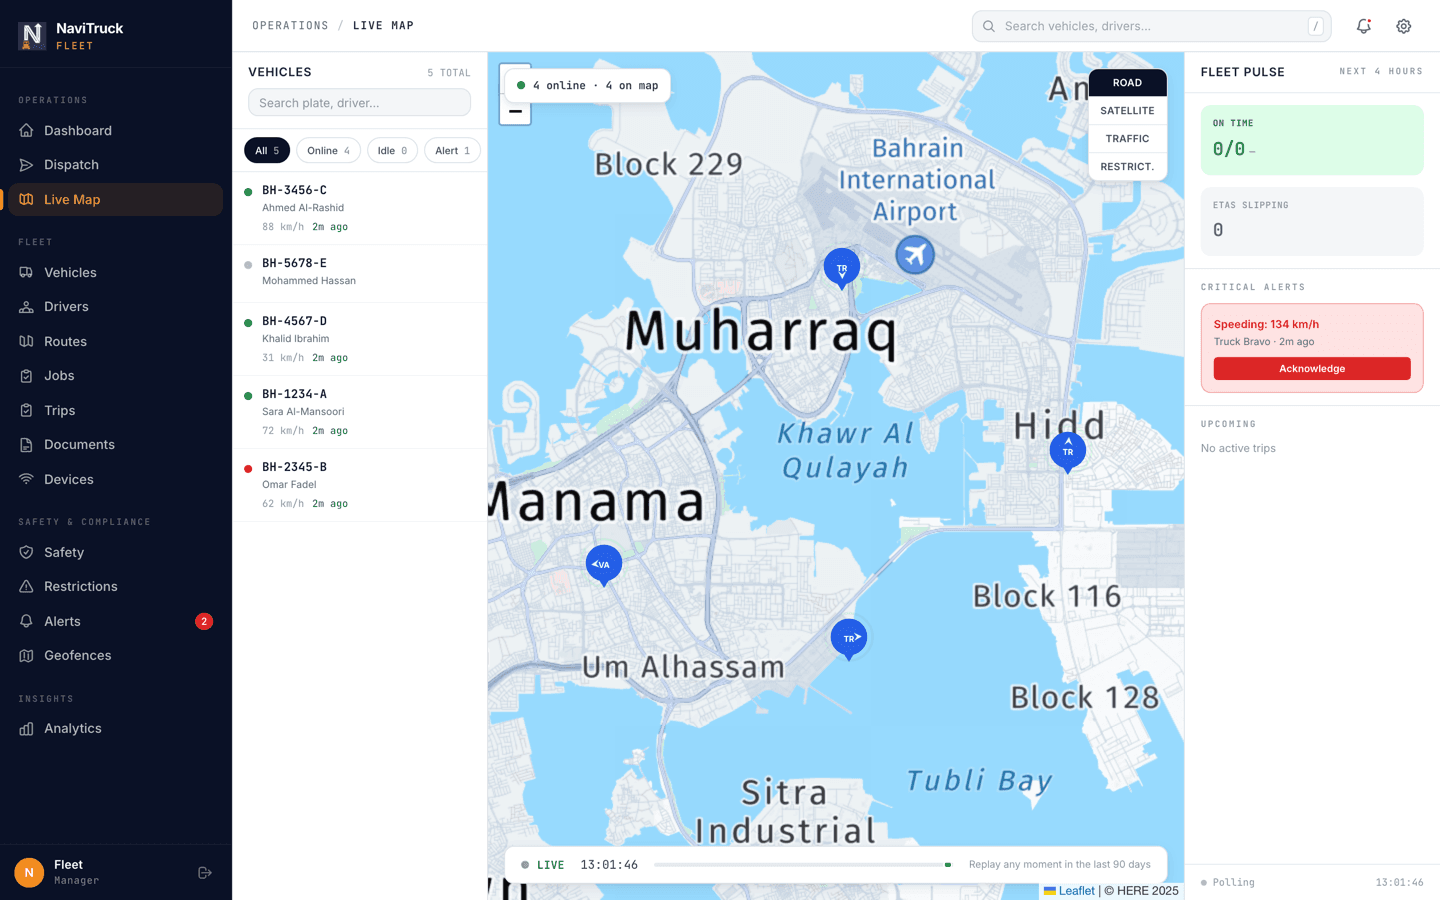
- Open Live Map. Every connected truck appears with its status, speed and last position.
- Click a truck for details, or use Route planner to build and dispatch a truck-safe route straight to the driver's phone.
Nothing on the map yet? Trucks appear the first time a connected driver starts navigating.
Draw a place (geofence)
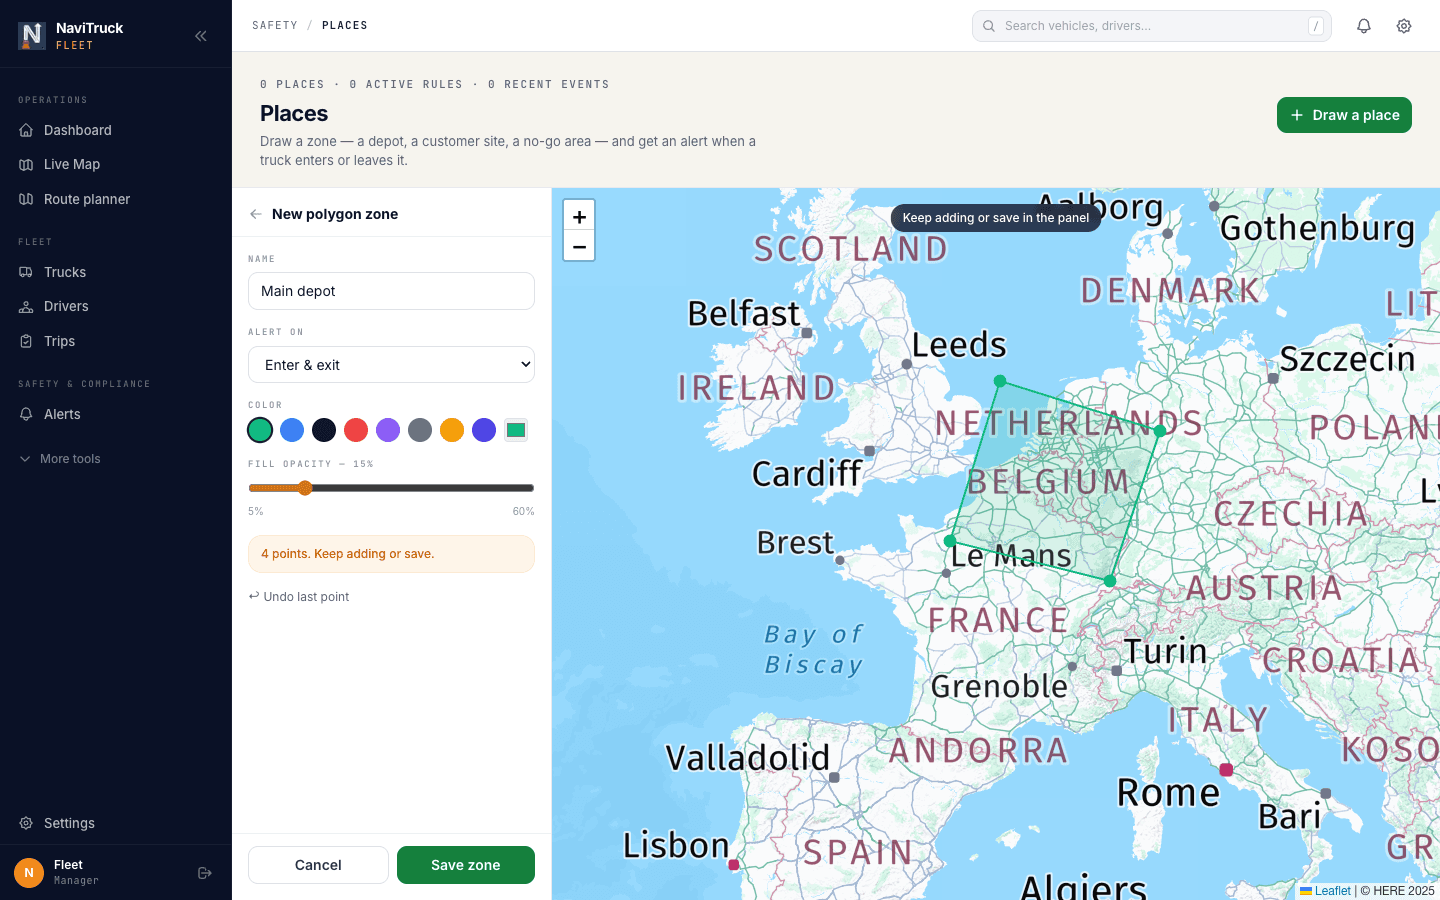
- Open Places (in the sidebar under More tools, or go to fleet.navitruck.pro/geofences) and click Draw a place.
- Name it — a depot, a customer site, a no-go area — and choose whether to alert on enter, exit or both.
- Click the map to place the corners of your zone. Three points make a zone; add as many as you need.
- Click Save zone. You now get an alert whenever a truck enters or leaves it.
Set up alert rules
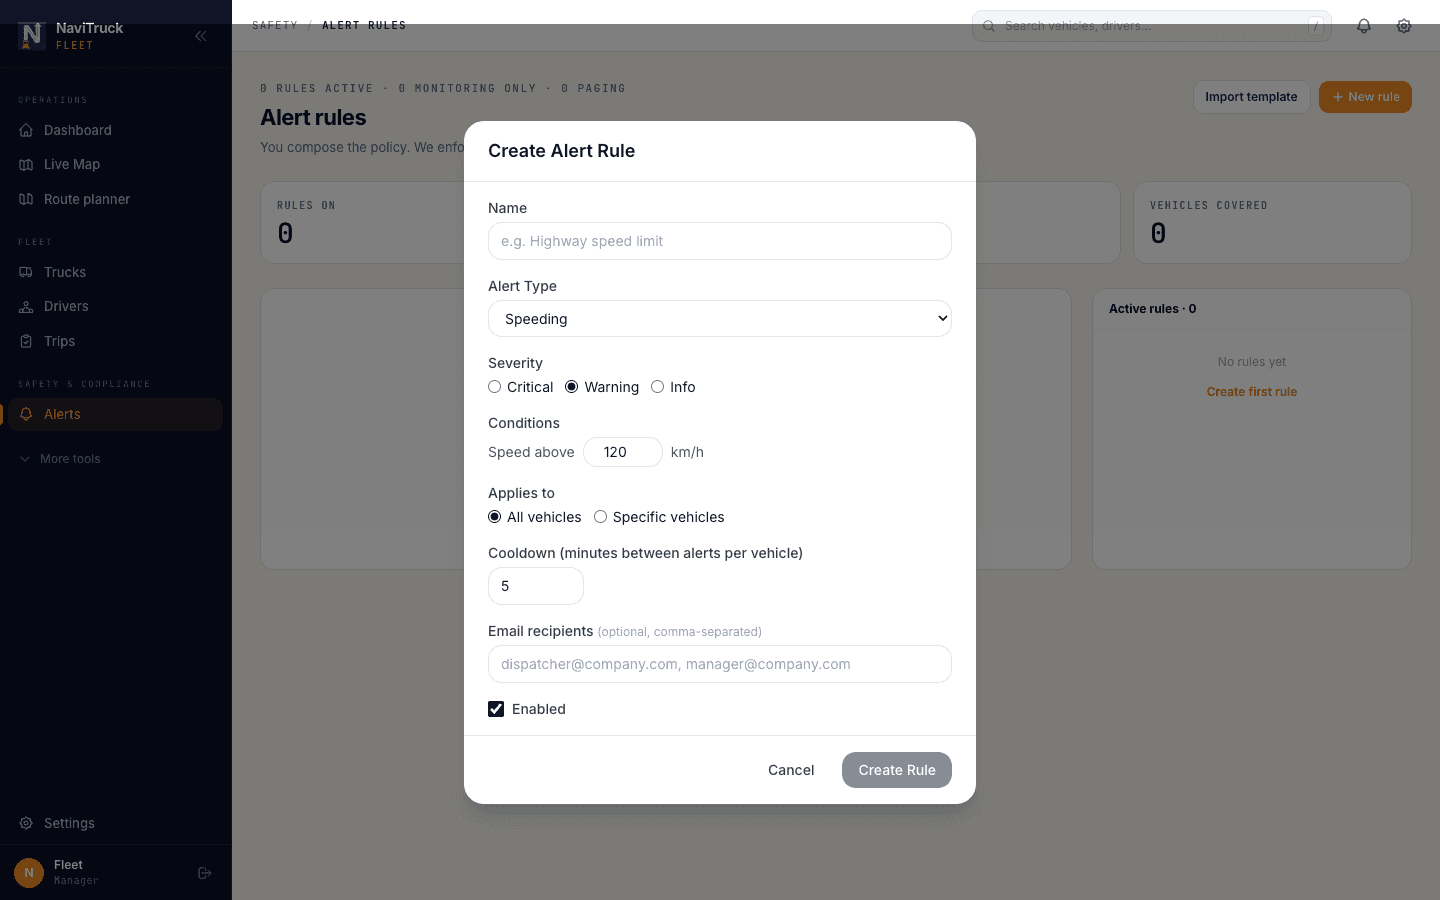
- Open Alerts, then Rules, and click New rule — or Import template for ready-made rules.
- Pick the type (speeding, vehicle offline, geofence, harsh driving…), set the threshold and severity, and choose which trucks it applies to.
- Optionally add email recipients, then click Create Rule. Alerts show in the bell at the top right and on the Alerts page.
Invite your team and check your plan
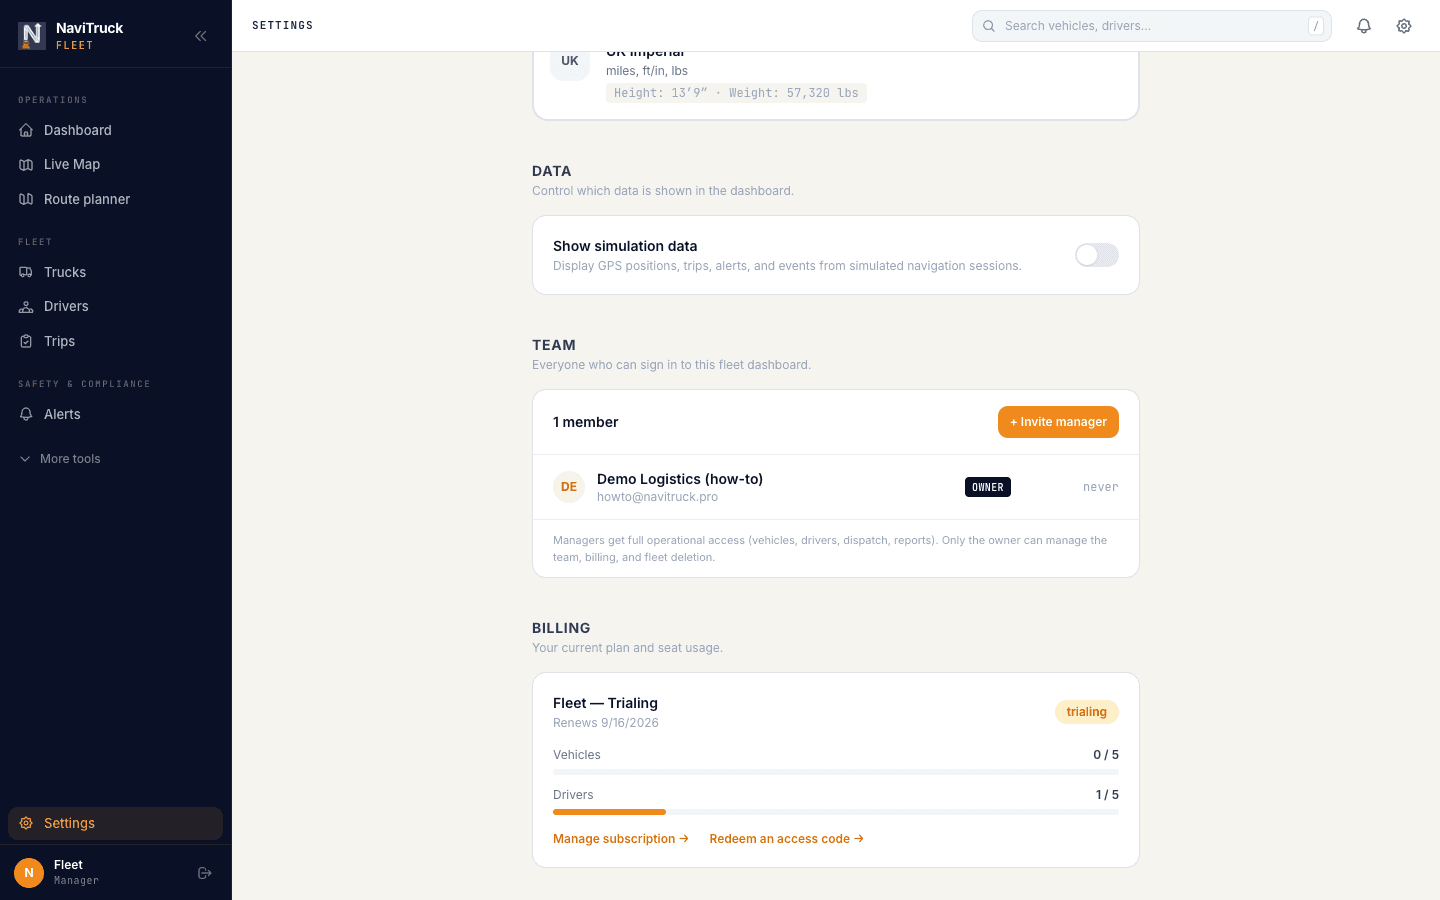
- Open Settings. Under Team, click Invite manager to give a dispatcher their own login. Managers get full operational access; only the owner handles billing and the team.
- Under Billing you see your plan, how many of your seats are used, and your end date. From here you can subscribe, manage a subscription or redeem another access code.
Stuck?
Reply to the email you received from NaviTruck, or write to help@navitruck.pro. We answer personally.